Refund / Recoups payment
If you were overpaid for service, you can record the refund check information within EMR-Bear.
Entering a refund check
- From the billing area, click the Money Tab, then click Refunds.


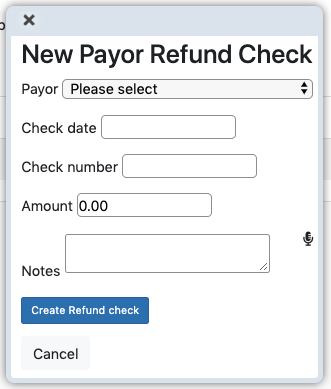
- Click Enter a new check

- Fill in all the required details about the the refund check and hit Create Refund Check
Applying refunds to Billcases
- Once you have entered a refund check, you can apply it to billcases in the system to balance them out.
- From the the refunds area click the Apply button (with eyebal icon).

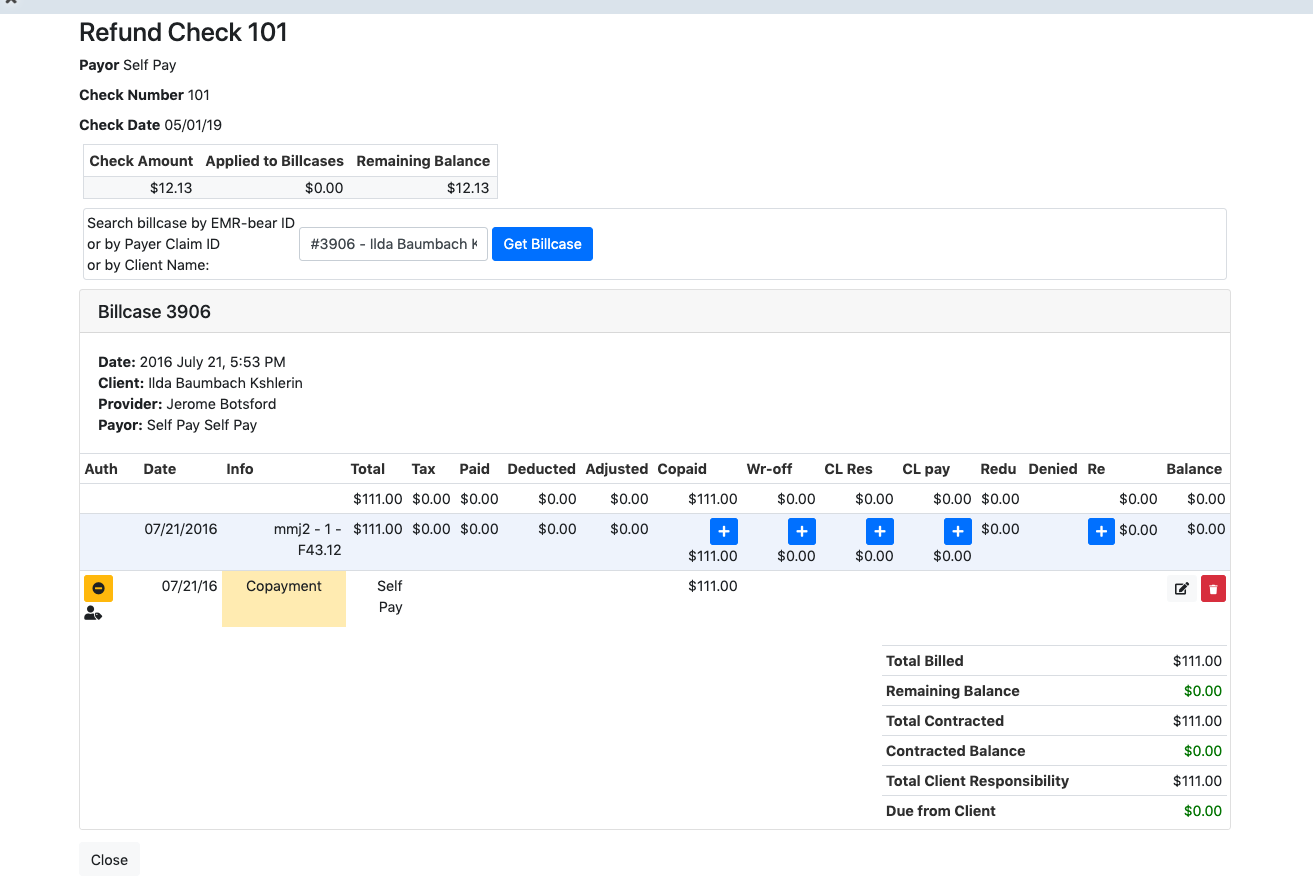
- Here you can see details about the refund, as well as any billcases that you have already assigned to this check.
- Search for a billcase by typing an ID, Payer ID, or Client Name into the box.
- Once found select it, then click Get Billcase.
- Once the billcase is loaded, click the blue + button in the Re Column. Re stands for refund.

- Finally enter the amount and which claim and EOB the refund originated from.
.
Table of Contents
Other Billing Articles
- Fee Schedules
- Fees
- Payor
- Payor Plan
- Incident to Billing
- User credential for Billing
- User Roles
- Front Desk Billing Configuration
- Certification or Licensure number
- Provider number
- Adding location
- Billcase
- Superbills
- Billing configuration
- Billing the secondary and the tertiary insurance
- Printing claims
- Batch processing printable claims
- EOBs
- Posting Manual EOBs
- Specifying billing codes In the form
- Printing individual claims
- Claims
- Bundled service
- Taxes
- Aging report
- Payments
- Creating Statements/Copay Report
- Fixing a denied claim
- UB-04
- Claim printing settings

