

Billing configuration
- Billing parameters allows specific setup of certain billing actions. Clearing House authorization information can be set up, and the tax rate can be established for each location. To access the Billing Parameters, go to Biiling -> Config.
Change the setting
If you want to edit any settings, pick the Billing Confguration button (has pencil icon)


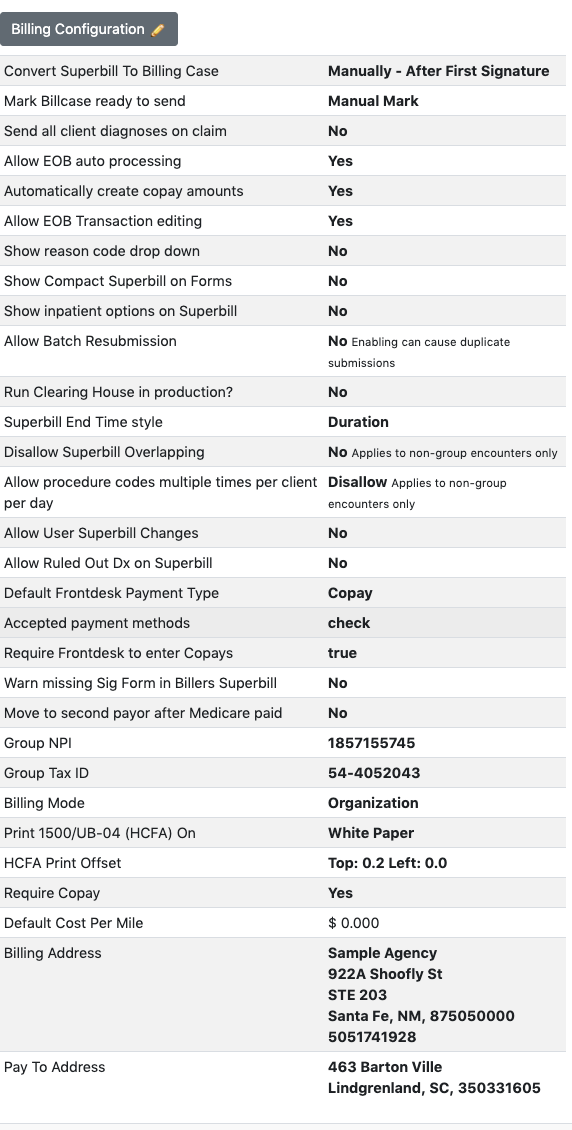
Explanation to every field are as follows:
- Convert Superbill To Billing Case: controls when a Superbill becomes a Billing Case. By default, this is set to manual, allowing you to review all Superbills before they are converted to a Billing Case. Options are available for automatic conversion.
- Mark Bill Case Ready to Send: chooses whether or not Billing Cases need to be reviewed before they are marked as ready to be sent to the Clearing House.
- Show Compact Superbill on Forms: Checking this box removes the prior authorization field from the Superbill model.
- Run Clearing House in production?: must be checked to allow the system to send claims to the live Clearing House environment. Uncheck to send claims to the Clearing House test server.
- Superbill End Time style: Displays Superbill end times as either Duration or End Time.
- Default Frontdesk Payment Type: Changes the default payment type for the Front Desk view. Options are Copay or Client Payment.
- Group ID: the agency's group ID, which is required to send claims to the Clearing House.
- Billing Mode - Organization This mode will create claims with the service facility (box 32 on the 1500), and Billing Provider (box 33) set to the group name. The NPI & Tax IDs will come from the location and billing configuration settings, respectively.
- Billing Mode - Individual Providers This mode will create claims with the service facility, and Billing Provider set to the rendering providers name. The NPI & Tax IDs will come from the providers numbers. If the Provider has their own group NPI it will be sent as the billing provider NPI.
- Billing Mode - Individual Providers grouped by Location The service facility name, NPI, & Tax ID will come from the location. The rendering provider is the billing provider, but the billing NPI is the location NPI. On electronic forms the Submitter Name is set to the Submitter Name from of location
- Print CMS 1500/UB-04 (HCFA) Claims On - Choose white paper if you would like EMR-Bear to print the form background. Choose Preprinted Form if you will load preprinted forms into your printer and just need the information printed on them.
- Printable HCFA Offsets - Use this to adjust the alignment of the printable HCFA to better match your preprinted forms.
- Group/Billing NPI : This should be your organizations main billing NPI. It will be sent in box 33a on HCFA 1500.
- Move billcase to second if 1st is Medicare: If the first insurance is medicare, after we receive the payment it will move the billcase to the second one so that we can process that claim.
- Logo: You can upload your companies logo here.
- Allow resubmission of the batch: If this is checked you can resubmit the batch.
- Cents per mile. Some of the reports can calculate a cost of travel. The cents per mile used is defined here.
Clearing house
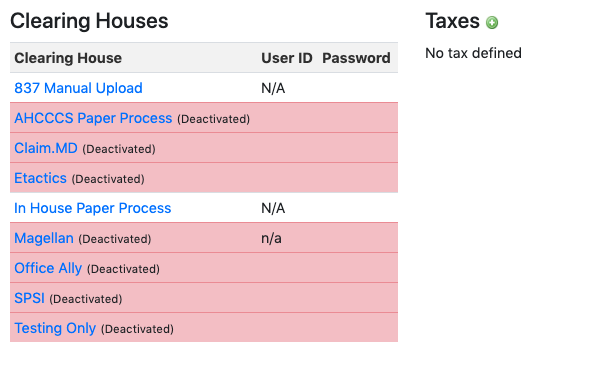
- To allow EMR-Bear to send claims electronically, you will need to enter your credentials in the systems Billing Configuration area under Clearing Houses.
- The username and password you enter here may not be the same as the one you use to log in on the Clearing House website.
- For example Office Ally requires that you call in to request a separate STP username and password from them.
- The "In House Paper Process Clearing House" is used to generate printable PDFs of claims.
- There is no need to edit this item, any claims generated with it will not be transmitted electronically.
- 837 Manual upload: This can used to download the claims and to upload them manually into the payors website. Claim.MD and Office Ally: You need to create an account with this clearing house to start using it.
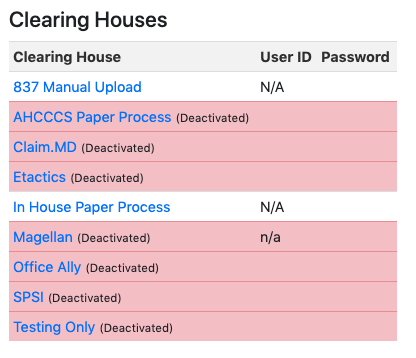
To edit settings of the clearing house, click on the name of the clearing house
Clicking on the name will open up a page where you can edit setting of the clearing house.
For Claim MD and office Ally clearing house, call them to obtain username and password.
Note: You should also ensure that Run Clearing House in production? setting is enabled in Billing Configuration.
Taxes
This part of the configuration can be used to define taxes for the people who do not have any insurance.
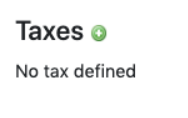
Click the green + icon to add taxes.
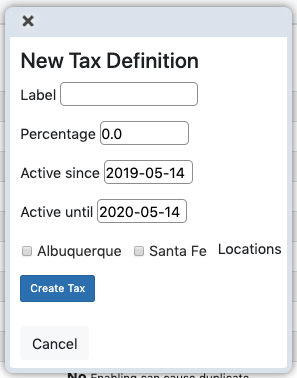
Give the tax a name, e.g. county-sales. Pick the location and define its start and end date. Select Create Tax.

Note the tax is now in the list
Table of Contents
Other Billing Articles
- Fee Schedules
- Fees
- Payor
- Payor Plan
- Incident to Billing
- User credential for Billing
- User Roles
- Front Desk Billing Configuration
- Certification or Licensure number
- Provider number
- Adding location
- Billcase
- Superbills
- Billing the secondary and the tertiary insurance
- Printing claims
- Batch processing printable claims
- EOBs
- Posting Manual EOBs
- Specifying billing codes In the form
- Printing individual claims
- Claims
- Refund / Recoups payment
- Bundled service
- Taxes
- Aging report
- Payments
- Creating Statements/Copay Report
- Fixing a denied claim
- UB-04
- Claim printing settings