Group Notes Forms
A group is a set of clients that meet together at a common time. There are 2 ways to schedule groups in EMR-Bear:
- Legacy Implementation
- New Implementation
Unless you have an historical reason, use the new group implementation. It is a more useful implementation.
Legacy Group Implementation
A Form that is assigned for Group Notes will show in the Form Template with the following icon: ![]() There are few things that must be in place for Group Notes to be activated during the documentation of an encounter.
The group activity model must be included in the form template.
There are few things that must be in place for Group Notes to be activated during the documentation of an encounter.
The group activity model must be included in the form template.

When this model is included in a Form, the Form will search for other appointments in the group and synchronize the content of the note in the "Group Activity" model across all the other encounter forms of the group.
Creating a legacy group appointment
The appointment from which the note was started must be a Group Appointment.
There must be more than one appointment in the group.
After the appointment is created, it will look as shown below.
Group Appointments must be checked in.
If all the appointments are not checked in then it will display all non-checked-in clients in the system. As shown in the picture below
If one of the appointments is not checked in, then the group model will not synchronize nor start the document for that client. When the Provider starts any of the notes of the group, the system will do an internal check to see if there are more appointments that need to be started in the group. The system will automatically start all the notes for the group appointments (that are for the same provider at the same time) and display the links in a grouped encounters box. Whenever any data on the "Group synchronized note" is updated, the system will synchronize the content of that model across all the notes of the group. Note: it only synchronizes the "Group synchronized Note" model, not any other information. The provider will still need to write any client's particular documentation, fill each Superbill, and sign each note. The following picture shows the screen shot of group synchronized note.
New Group Implementation
The new group implementation differs from the legacy implementation by way of how the group is defined. In the new implementation you define the group first with all its members and then schedule the group as a unit. In the legacy implementation you created the group as a side effect of scheduling clients at the same time and setting the group values when you individually schedule the appointments.
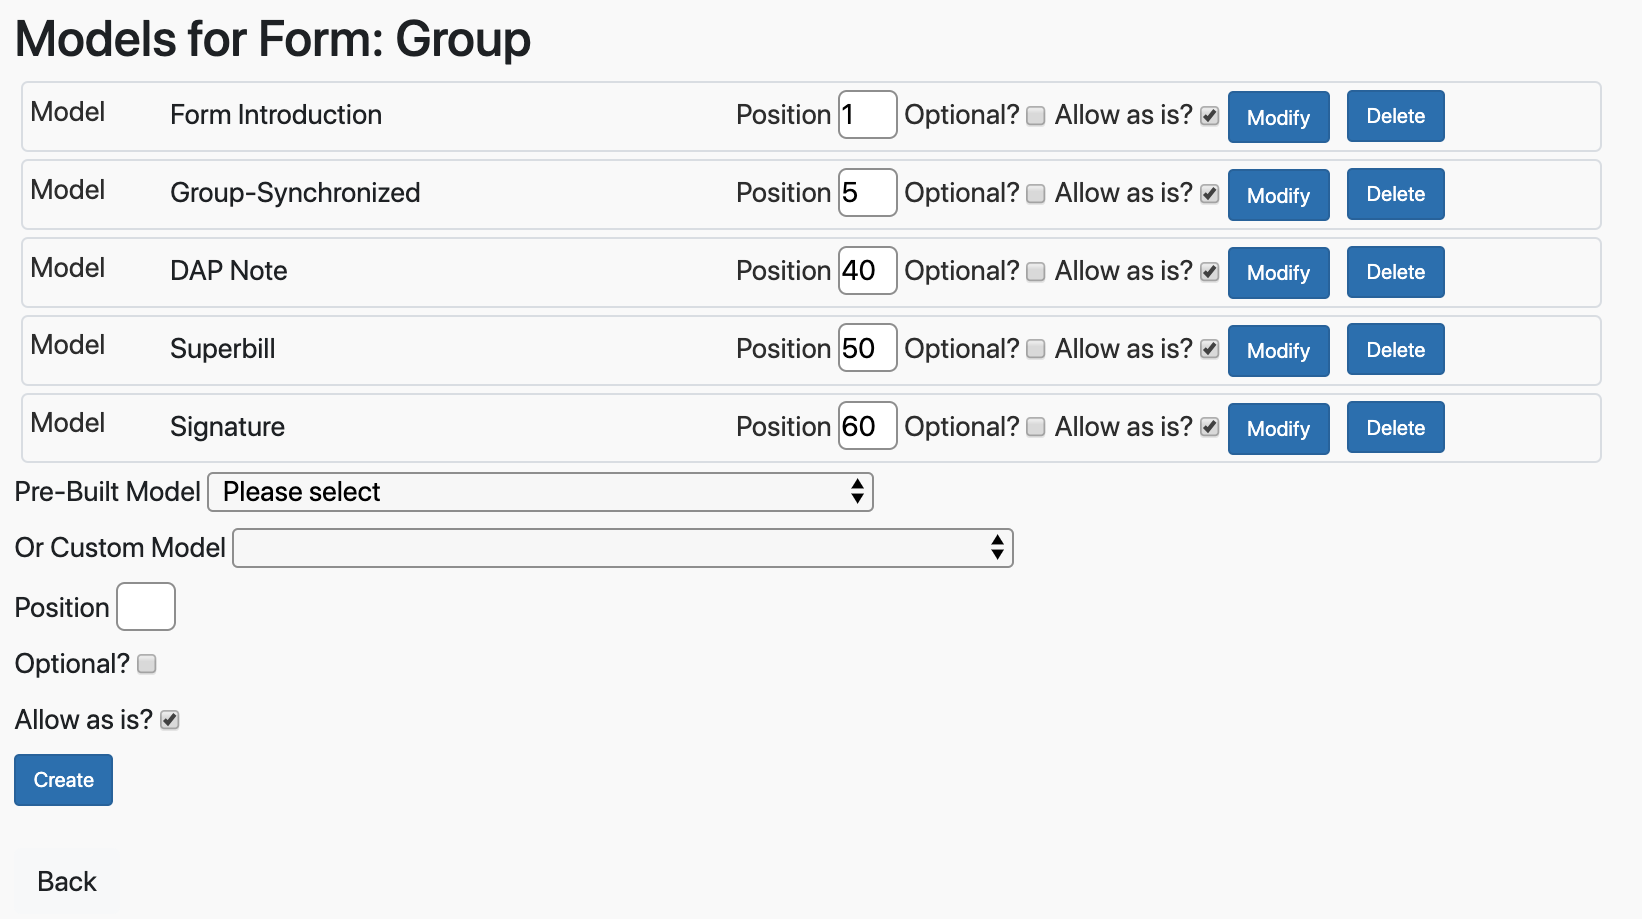
Add the model group-synchronized
You need to add the group-synchronized model to a form in the program. We have a from already defined called Group, which includes this model, as the graphics below shows.
Define the Group
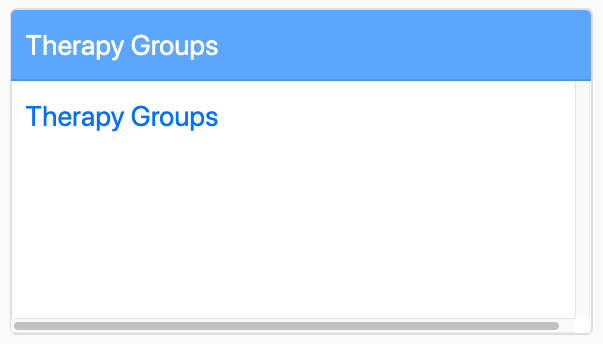
Start by defining the group. From the Dashboard, Therapy Group section, select Therapy Group.
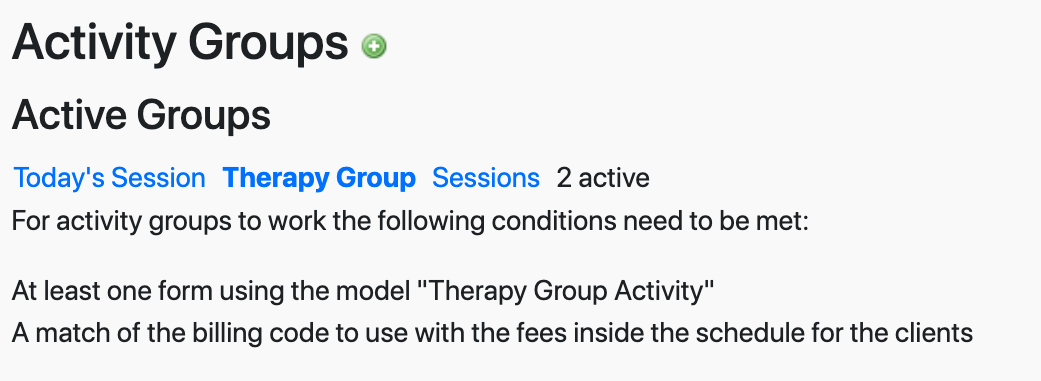
You land on a screen that shows active groups.
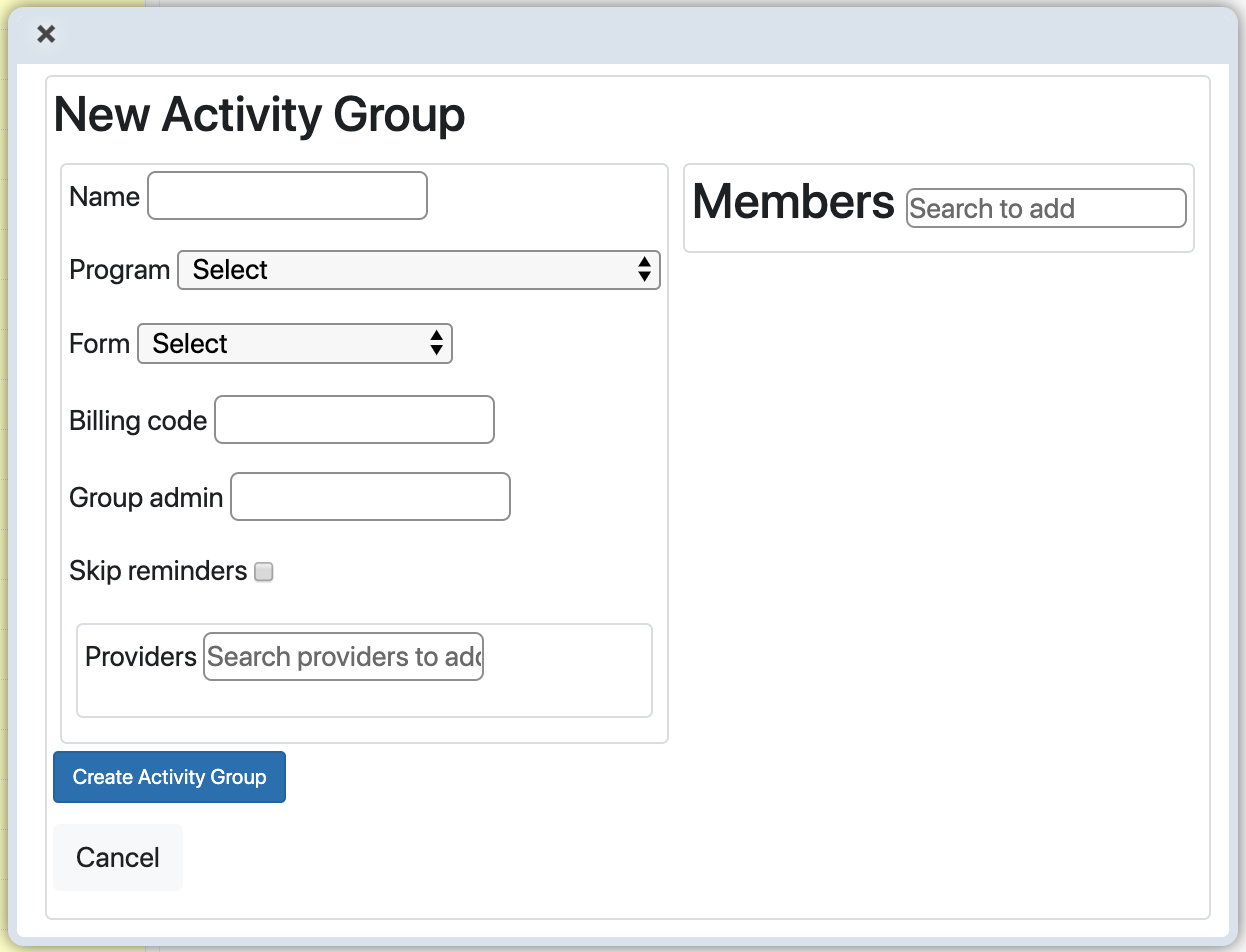
To create a new group click on the green plus sign icon. You will define group information and then add the individual members
Add individual members
To add members to a group, first select the group. From Dashboard => therapy Group, select the group you want to add to.
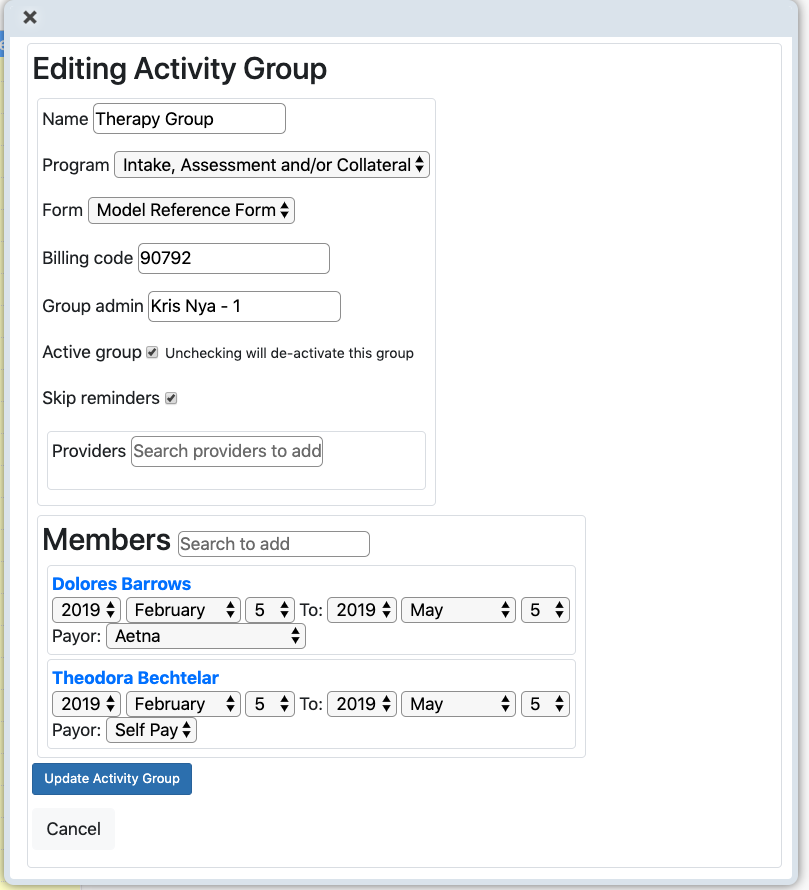
Pick Therapy Group.

On the Editing Activity Group screen, at the bottom, next to Members, start typing to search for the name you want to add. Once you have selected it, click button "Update Activity Group".
Schedule the group appointment
Go to the calendar, either the daily or weekly view. The daily view is to the left of the dashboard. We will schedule an appointment today at 10:00AM for an hour. WIth the mouse pick in the small column to the right of the time. The New Appointment screen comes up.
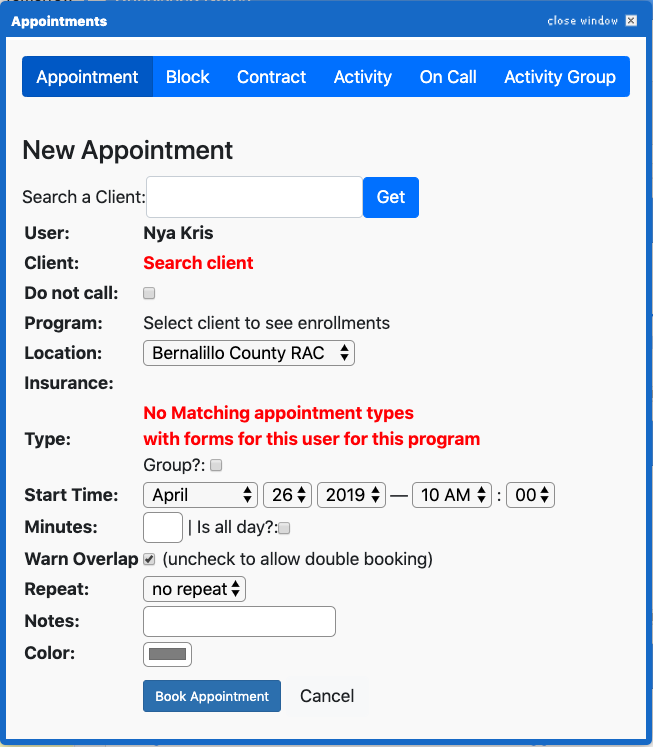
Pick "Activity Group" tab in the right side of the header.
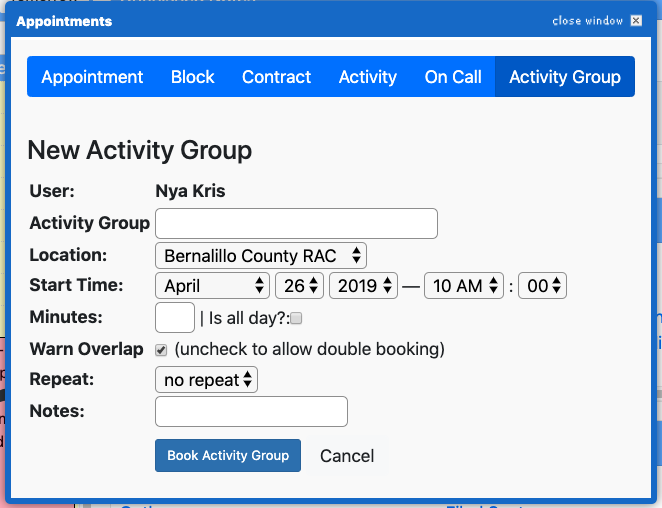
In the New Activity Group screen, type characters of the group name, in our case, Therapy Group. The start time is set. Type a duration in minutes, 60.
You can use repeat to set up a recurring appointment that repeats daily, weekly, or monthly.
Select Book Activity Group to schedule the group appointment. You will see the appointment appear in the calendar.
Activity Group Status Icons
Click on the Edit icon in the calendar for a Group appointment. Notice the icons next to status
These icons are for changing the status of the activity group. Hover over an icon to see its meaning.
- Conf -- Confirm
- Chin -- Check In
- Cx -- Cancel
- NoSh -- No Show
Checking the group in
Click the Check In Icon
Checking the group out
TBD How?
Table of Contents
Other Forms Articles
- Document Timeliness
- Viewing all the due documents
- Document Tracking
- Unfinished notes/Unstarted notes
- Client tracking.
- Clinical Template Forms
- Creating a New Form
- Prebuilt Models
- Adding and Modifying Models
- Client PDF
- Basic Models
- Special Input Models
- Treatment Plan Models
- General Use Model
- Client File Forms
- Custom Models
- Restrict Form View to Creator Only
- Save Incomplete Models

