

Creating a New Appointment
You can schedule appointments from the daily calendar view or the weekly calendar view.
- If you are an individual working on your own appointments, use the daily view.
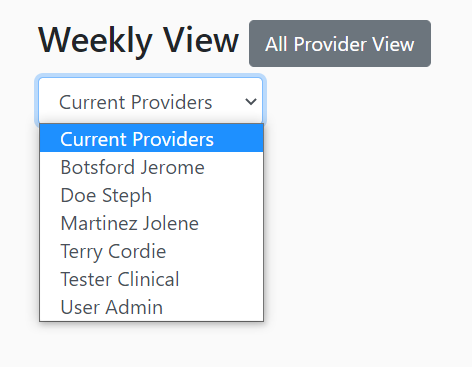
If you are Front desk personnel, use the weekly view. It allows you to schedule for any provider.
To create a new appointment, Go to Dashboard -> Front Desk
Notice the yellow daily calendar on the left. This is the daily view. The provider is already set to the current logged in user.
If you want go to the weekly calendar click on Dashboard > Appointments.
Choose the required provider from the dropdown menu on the left
Picking the date
Whether you are following the daily or weekly path, the operations to select the appointment date are the same, but the visuals are slightly different, as you can see from the images below.
- After you choose the required provider, you can click on the date picker to pick a date.
Daily View Calendar
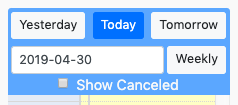
Weekly View Calendar

Although the date pickers look very different, they offer the same functionality. You can navigate to yesterday or tomorrow or reset to today. The weekly view also allows you to also skip ahead a week or two. If you click on the date field, the date picker will open up.
- This allows you to choose the date for the next appointment.
- Use the arrows to move from month to month or use the calendar to pick the day of the week.
- It is also possible to type a date into the field. Use yyyy-mm-dd format.
Clicking on the day of week will close the calendar and take you to the appropriate calendar view.
Picking the Appointment Time
Click on the small yellow strip to the left of a specific time (highlighted in red on this image) to open a New Appointment box.
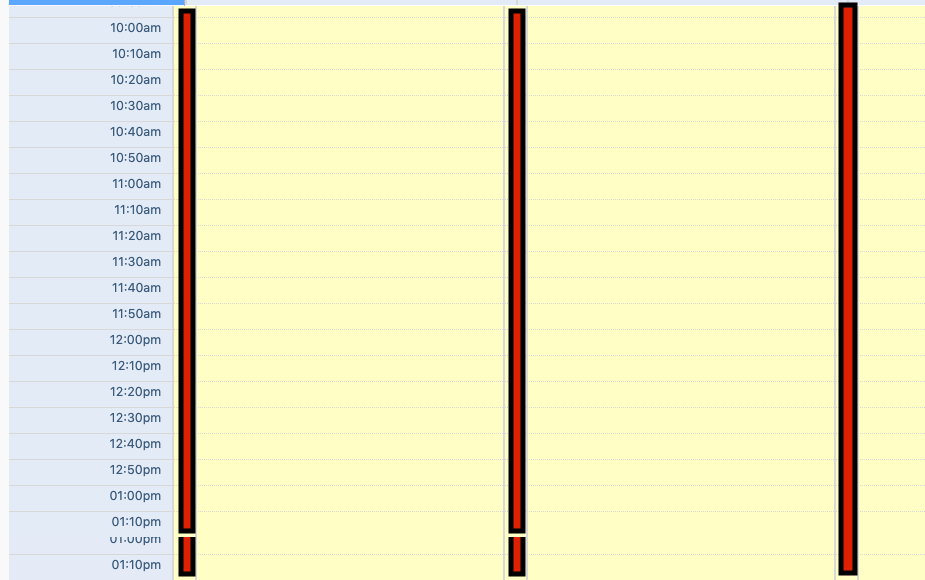
- Clicking on the yellow strip (red! for emphasis here) will open Appointment Box. Here we have chosen 11am on April 29th.
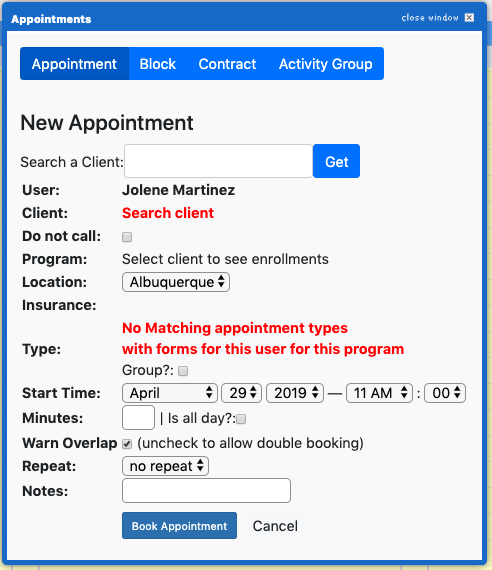
Enter Details Into the Appointment Box
- Make sure the date and time that appear in the new appointment box is correct.
- Search for the client by typing the name in the box.
- If the client is new then add him into the system and then try scheduling an appointment for him.
- This will generate suggestion with all the names similar to the searched client.
- You can even search with clients DOB in mm/dd/yyyy format, ssn or client ID #.
choose the required name from the list or clicking on the blue "Get" button will populate all the information like insurance details, programs the client is enrolled on and the location.
Note the client's name appears in blue with the provider's name as User.
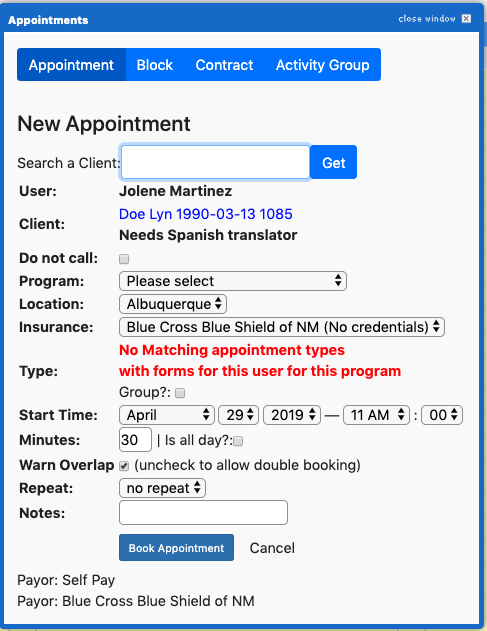
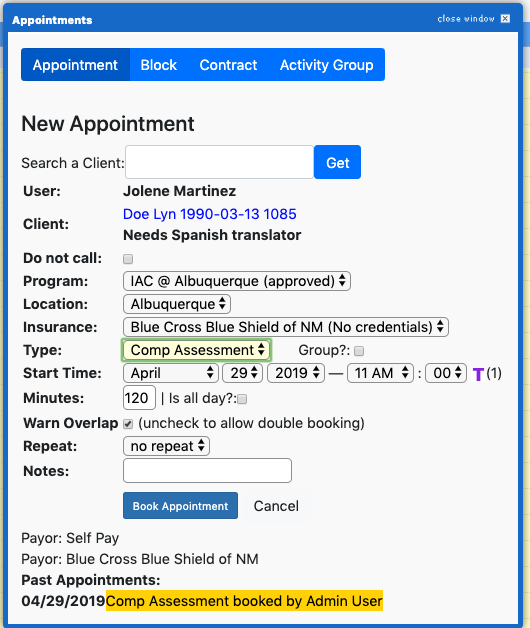
- Choose the Program, Type, Location, and Insurance associated with this appointment.
- The below images displays the program the client is enrolled in and the type of appointment he will have on that day.
(TBD Add link to client programs and users appointment type here)
When we created this appointment we got a warning that insurance credentials do not yet exist for this client. Do you want to create this appointment anyway? We created the appointment.
- These fields are automatically associated with the client once that person has been selected.
- These fields are created when the Client's profile is established under New Client or added to an existing Client's profile as needed.
- To review how this is done, go to the Main page-> hover over Dashboard -> New Client.
- The Group? checkbox should be checked if the appointment is going to be a group treatment.
The Minutes field display the number of minutes the appointment will be for that day.
You can check Is all day? box if the appointment is going to be throughout the day.
You can hit Repeat on: checkbox if the appointment needs to be repeated anytime soon. Check the day the appointment needs to repeated and until the inputed date.
Any additional notes can be included in the Notes field.
click the blue Book Appointment button to complete scheduling an appointment .
The appointment will appear in the yellow calendar as follows.
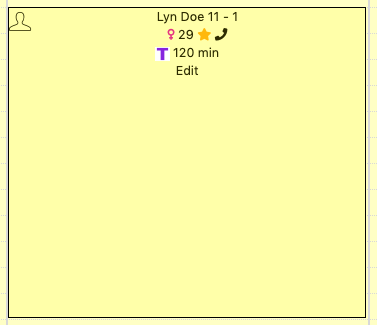
Table of Contents
Other Front Desk Use Articles
- Front Desk Overview
- Key Features for Front Desk
- Front Desk View
- Confirmation of an Appointment
- New Client
- Check In
- Cancelling an Appointment
- No Show
- Copay and Receipts
- Reminder Calls
- Printing a Schedule
- Verification Worksheet
- Signature Forms
- Notes
- Client Information on the Front Desk
- Pending Letters