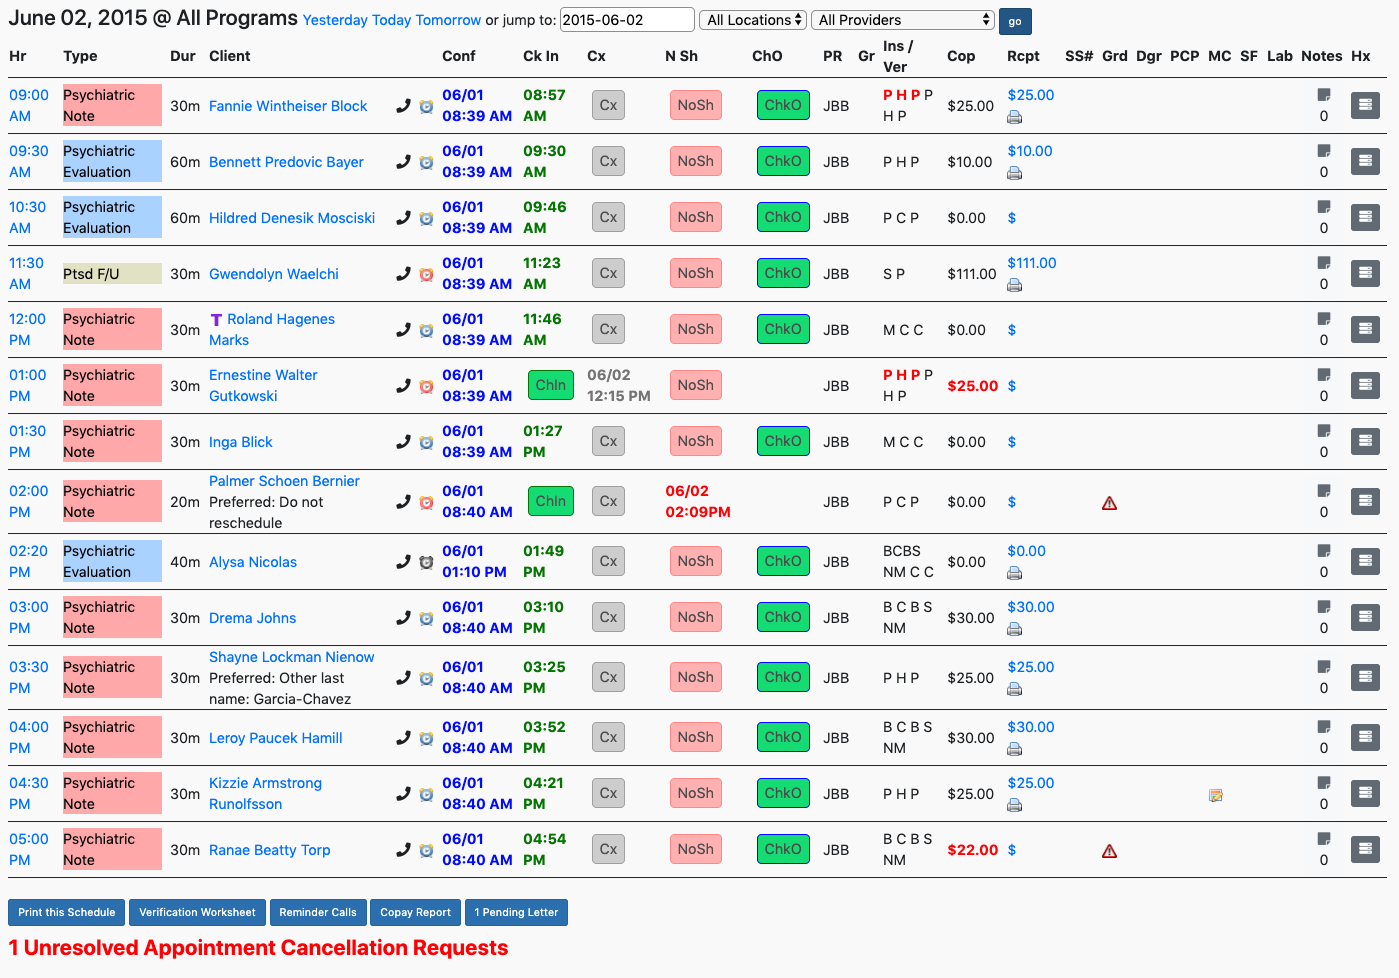
Front Desk View
For those users that have the “Front Desk” role as their primary system role, the Front Desk Dashboard is their EMR-Bear homepage. Or, to access the Front Desk Dashboard from the Main Dashboard, hover your mouse over the dashboard button present in the top left corner of the page. This will display a drop-down menu with the front desk option in it.

Once you are in the Front Desk page, the control bar at the top of the page gives you options to filter appointments by dates, location, and by the name of the provider. Hit the Go button in blue after selecting your options to filter and update the results. The results will not be updated unless you hit the blue Go button. Once the filter is set it will remember the filters you use so you don't have to apply filters every time.

The filter in the Front Desk page has the following options:
Day: Filters appointments for today, tomorrow and yesterday. You can view the appointment on any of these days just by clicking on the link (Today, Tomorrow, Yesterday) or jump to any day you want with these filtering options.
Location: Filters by office location. The choice of location chosen here will be remembered by the system for your convenience for all future searches. . If your location is "Office 1", then after you select it the first time, the Front Desk will show only appointments for “Office 1” until you change it.
Providers: Filter by any one provider or show all providers.
Other Front Desk Use Articles
- Front Desk Overview
- Key Features for Front Desk
- Creating a New Appointment
- Confirmation of an Appointment
- New Client
- Check In
- Cancelling an Appointment
- No Show
- Copay and Receipts
- Reminder Calls
- Printing a Schedule
- Verification Worksheet
- Signature Forms
- Notes
- Client Information on the Front Desk
- Pending Letters

