
User Roles
User Roles
This feature allows your agency to control who within the organization has the ability to schedule appointments or other kinds of events that would appear on a schedule. Using a control panel that we have created for managing scheduling permissions, your agency will be able to limit or grant permission according to 3 variables:
You can grant all users with the front desk, human resources, sysadmin, or clinical manager roles the ability to schedule. This would grant permission to any person in a management position the ability to schedule appointments on someone else’s schedule and/or their own.
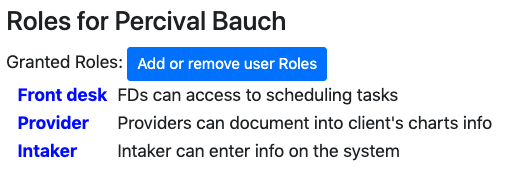
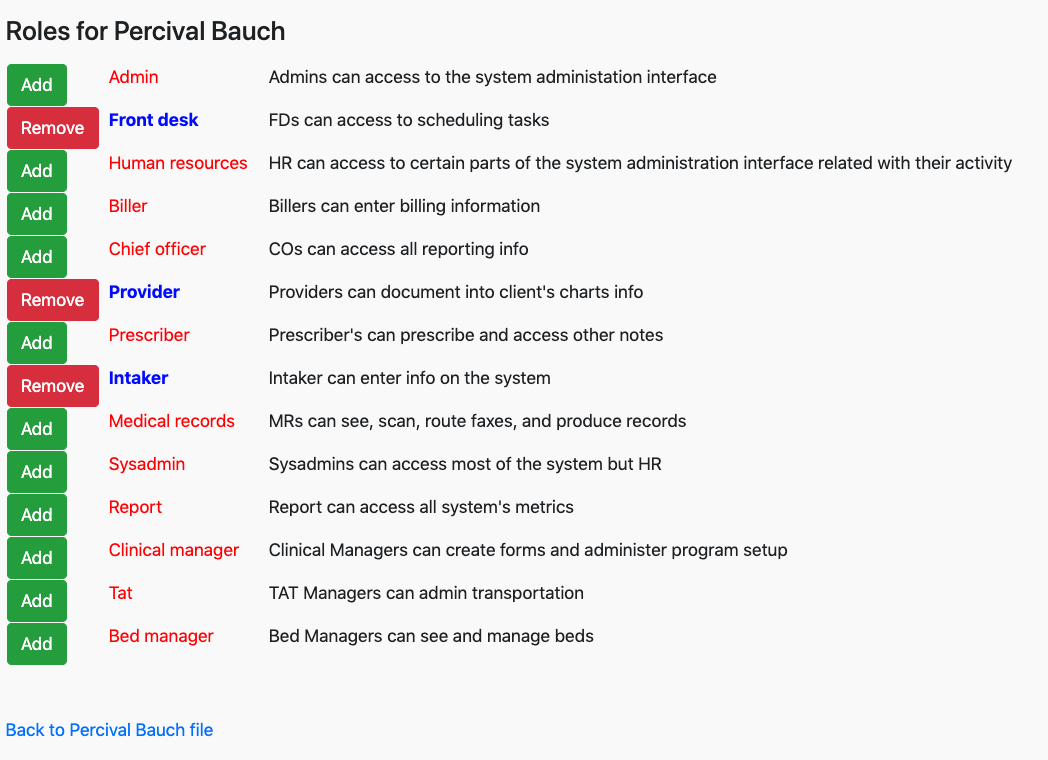
Roles can be assigned to a user by clicking on the "Add or Remove user Roles" link under Roles in the User Record.
- Roles assigned to a user in the system dictate what permissions they will have in the system, what functions the system will allow them to take, and what areas of the system they are allowed to access.
A summary of each role is provided below. For a detailed table of functions granted by these roles see Permissions.
- Admin: allows access to the system administration interface and all functions available to other roles.
- Sysadmin: allows access to all of the same features as the Admin account, except they are restricted from HR information.
- Front Desk: allows Front Desk User to see all scheduled appointments for the selected date, location, and provider. This role has the permissions required to schedule appointments, add information to existing clients, and create new clients. They can also start client consent forms, communicate via the intercom system, and view billing reports.
- Human Resources: has access to functions permitting them to manage other Users of the system. The User's function allows HR to create, modify, and delete Users. This includes the ability to add or remove roles from a user account and reset their password. Additionally, HR can modify the credentials, certifications, form supervision requirements, provider numbers, and appointment types for any user in the system.
- Biller: allows permission to view and edit billing information. This includes access to Payors, Fee Schedules, Billing Reports, Superbills, and Bill Cases. The Biller can also process claims and send information to Clearing Houses.
- MD: allows access to the prescription interface allowing management and prescribing of medications. MD's have the ability to view any Encounter Form, even those they did not create.
- Provider: can add documents to a client chart. However, they cannot view or edit files attached to a client they did not create. This role allows the ability to modify a client, including the ability to view and edit demographic and insurance information.
- Intaker: able to enter information into the system including basic client information and appointments. They can add new files to a client, but are unable to access any files that they did not originally create.
- Medical Records: has the ability to view any client records in the system even those they did not create. They also have the ability to attach new files to a client. Chief Officer: grants the User access to daily provider activity reports and Superbill reports.
Click the Add button that corresponds to the appropriate role for that User. You will see a pop-up window that confirms that you want to add that role for that user. Click OK. When all roles have been added, click on the blue link Back to User Admin File . This will take you back to the User Record.
Per-User Permission:
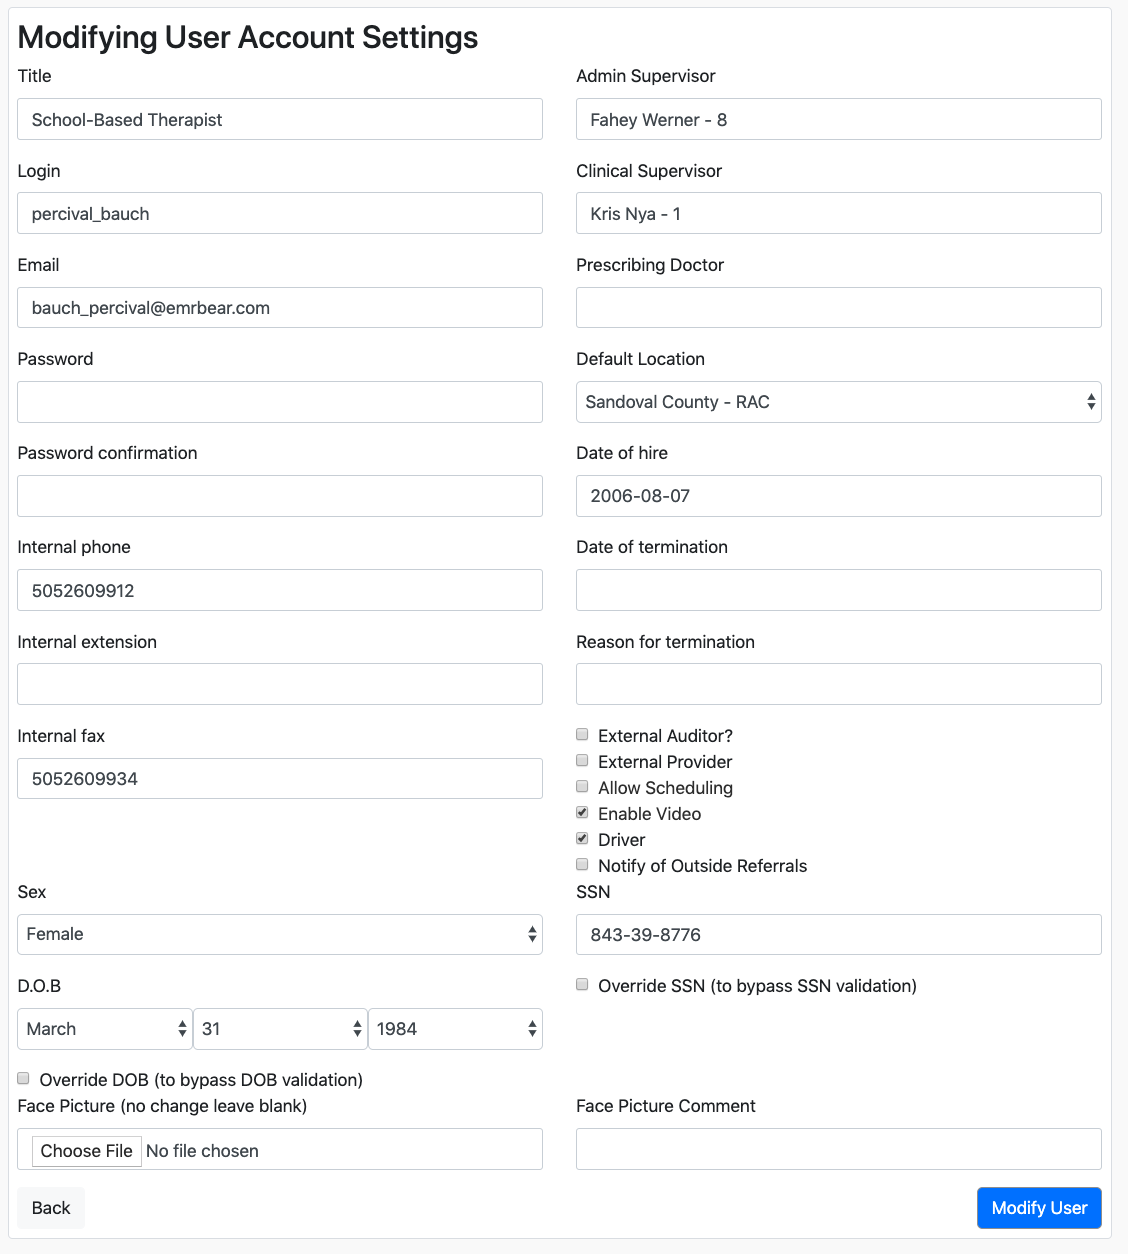
You will also be able to grant or limit scheduling rights to individual users using an overwrite button that appears in the user record. This could be used in a case where a user does not have one of the scheduling roles (front desk, human resources, sysadmin, or clinical manager), but should be allowed to schedule anyway. This feature could also be used if you want to limit scheduling to such a limited number of users that you would block everyone’s ability to schedule regardless of role, and grant permission to just a very select group using this feature.
This can be accomplished by going to the user and clicking on pencil icon next to the user name.

Check the allow scheduling button to let the user allow scheduling.
Uncheck the allow scheduling button to remove the scheduling permission from the user.
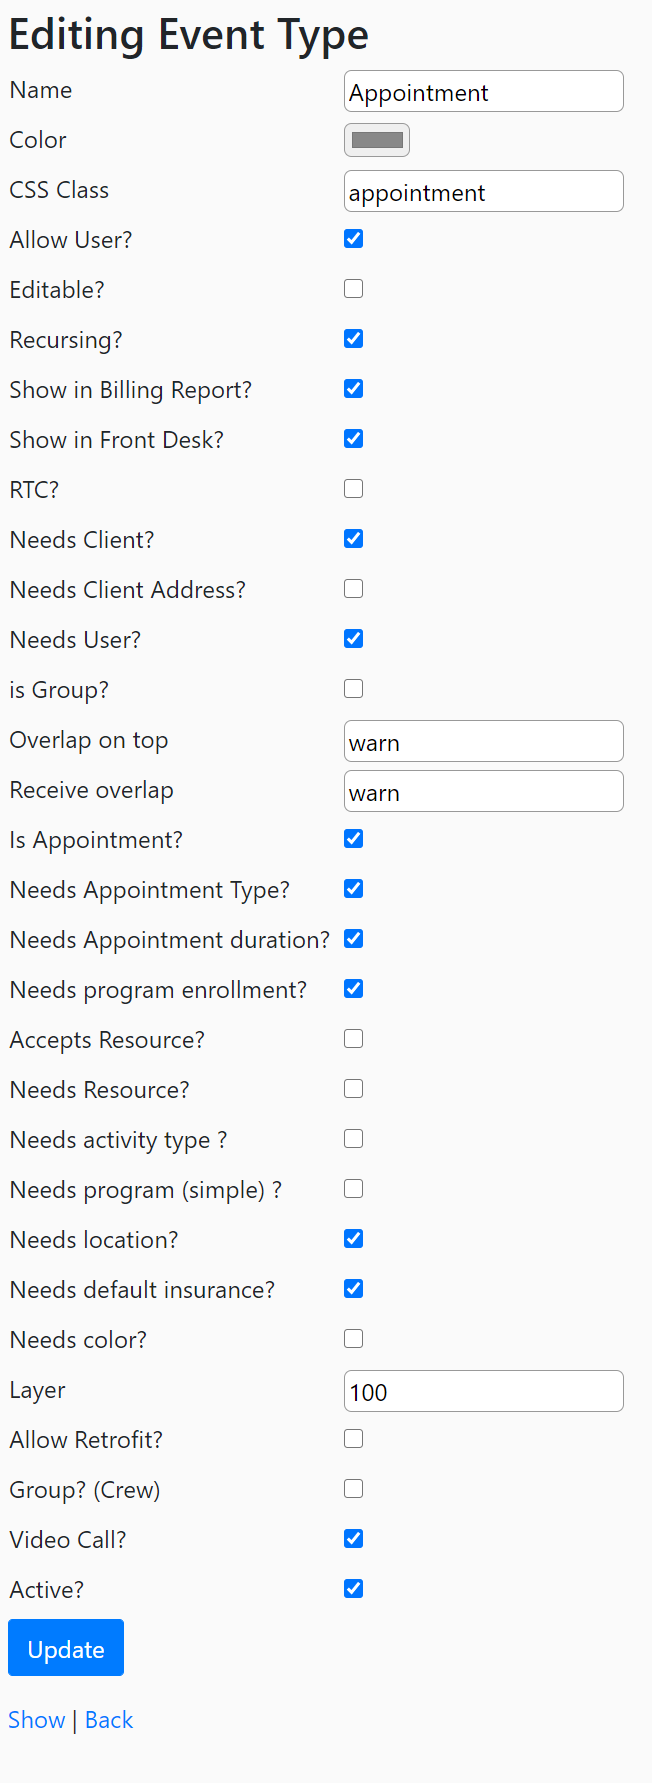
Event Type:
You can also limit scheduling per user or per user role by event type (Appointment, Block, Contract, or Activity).
This allows you to grant permission for users to schedule things like supervision or vacation time, but not schedule an appointment with a client. If your agency chooses to utilize EMR-Bear’s Service Activity Reporting system which can generate reports that could be used as productivity reports or timesheets, users would need to be able to access their calendars for this purpose.

To enter the edit mode for an event type, click on the column heading for the event_type you wish to change.

Select the "Allow User?" checkbox to allow this user to schedule this event type.