

Intercoms
Intercoms can be use multiple ways:
First way
- Intercoms are for electronic communication within EMR-Bear between therapists and staff regarding clients, billing, and other matters. The benefit of intercoms is that client confidentiality is not compromised since the communication remains within the EMR-Bear system.
- There are many ways to send intercom using EMR-Bear.
- From the Dashboard > Intercoms > Send New
- From the pull-down boxes, select the client that the intercom relates to. Then choose the system User (staff member) that should receive this intercom. Complete your message in the Message box, then select Send Intercom.
- To check for intercoms sent to you, from the Dashboard -> Intercoms -> Inbox. You will be able to view the content of the Intercom from the Inbox window.
- To mark the Intercom as read, click on the envelope icon that appears to the right of the Intercom date.
- Once the Intercom is marked as read, you can file away the Intercom by clicking on the file icon that appears at the far right side of the Intercom window. This Intercom will now appear under your Filed Rcvd tab rather than the Inbox.
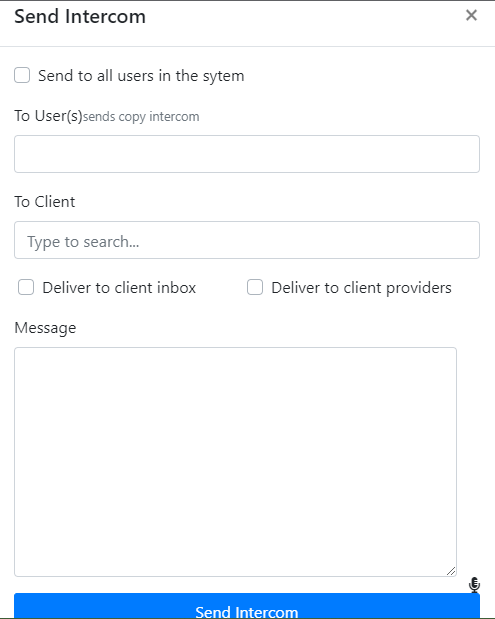
- Clicking on the Send New link will take you to the following page.
- Search the name of the client about whom you want to send the intercom.
- Enter the name of the user you want to send the intercom to.
- If you want the message to be delivered to the client too then check the checkbox.
- Or check the send to all users checkbox if you want the intercom to be sent to all the users in the system and enter the message that needs to be sent.
- Hit the send intercom blue button.
Second way
- The second way to send the intercom is from the encounter form.
- The Form Intercoms button at the bottom of the Encounter Form can be used to communicate between Supervisor and Supervisee about the note being viewed. This intercom will be viewable only between the sender and recipient it is addressed to.
- To create a new intercom, click the New button under Form Intercom which appears below the signature line at the very bottom of the Encounter Form screen. Type your message into the text field, then press Send Intercom.
- Search the name of the client on the search field you want send intecom about.
- Go to the client's file and click on the encounter form,
- Go to the bottom of the page and click on Form intercom,
- This part of the intercom links the clients encounter page with the message so that the user can edit the form if needed.
Third way
- The 3rd method is through Program Liaison. Go to the Dashboard > Clinical > Programs Click on the program you want to receive intercoms in. Click on the link that says Add Program Liaison. Everytime there is an enrollment the user whose name is enter will get an intercom about the enrollement. Clicking on the link will open up this page. Check the box that says Receive intercom.
Fourth way
- The fourth way to send intercom is from superbills. Go to Dashboard > Hover over Billing > superbills. You can send an intercom to the provider or any person related to the billing about the super bill.
Click on this( include the image of the icon) icon to send intercom and hit the New button
Fifth way
- The fifth method is the clinical rule. To use the clinical rule go to Clinical > Clinical Rule
- Click on the add clinical rule button and in the action section add intercoms. This means whenever that clinical rule is performed there will be an action with intercom sending option. The following image shows the method to add a new clinical rule with intercom action in it