

Demographics
Demographics
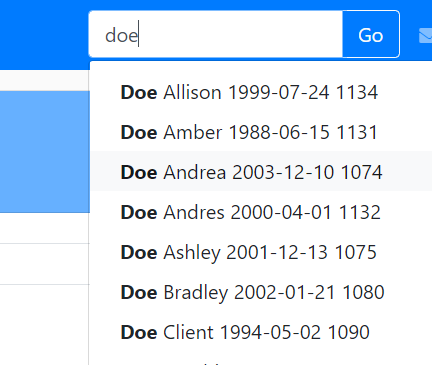
- To edit the Demographic information of a client, search the client using the search bar at the top right of the page and then select client as it appears in the search bar.
- You can search either by name, DOB, SSN or ID# of the person you want to edit the demographic information for.
- The date must of the format mm/dd/yyyy, if search by DOB.
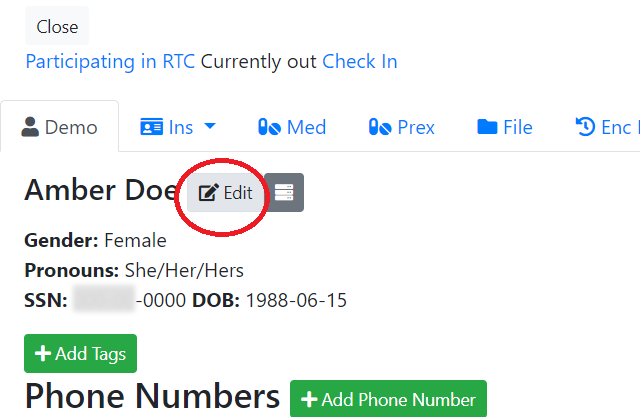
- The first tab in the client file is the Demographic tab and it is named as Demo. To load the demographic information of a client, Click the edit button next to the client name under the demographics Tab.
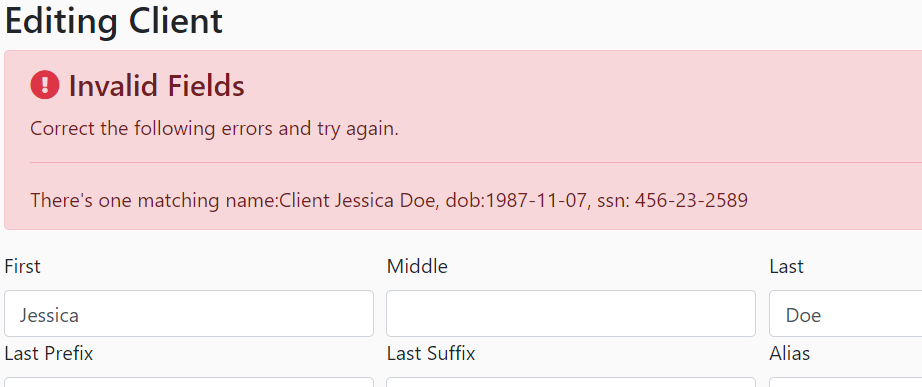
Adding a name in the demographics:
Add/edit the name information in the name field.
If the name of the client you are trying to add matches with any of the names of the existing clients in the system, then the system would generate the following error message.
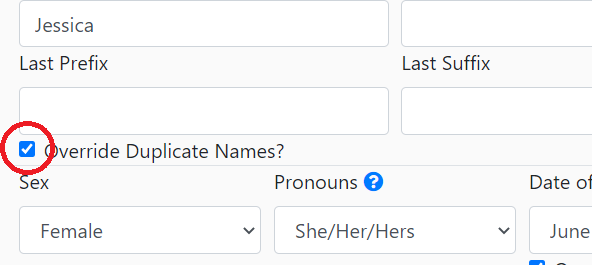
- Check if the client you are trying add is already in system.
- If not then check the Overwrite Name? checkbox as shown below:
Adding other basic information:
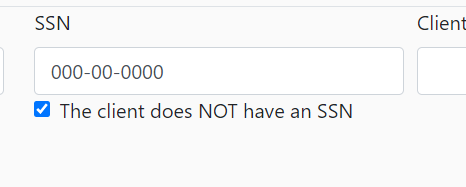
- SSN field cannot be blank.
- If you don’t know the SSN of the client, then add 000-00-0000 OR if client was never issued a SSN check the checkbox right under the field that says “Check if the client has never been issued a SSN” as shown below:
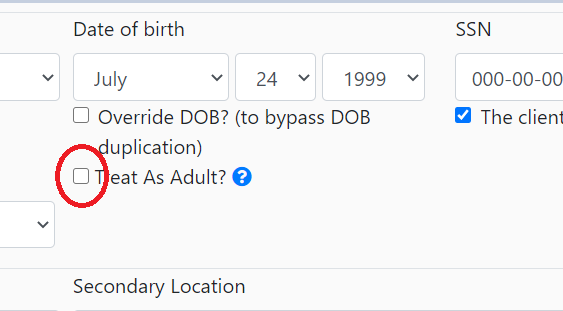
To add DOB, use the dropdown menu that displays month, date and a year option.
If the DOB of the client matches with anyone already in the system, you will see another error saying matching DOB. Check if the client already exist in the system. If not check the overwrite DOB? checkbox.
The Treat as an Adult checkbox can be checked if the client is a minor and you want him to be treated as an adult for the CCSS program.
- Add the service location of the client.
- The secondary location must be filled, if any program that a client needs is not provided at the primary location.
- Check Is New? if the client is new.
- Attach a face picture by clicking on browse button, then by choosing the picture file of the client in the computer, and finally saving it by pressing the upload button.
- After entering all the information, hit
 when creating a new client.
or Modify Client button
when creating a new client.
or Modify Client button  when editing an existing client .
Adding a phone number:
You can add as many phone numbers for a client as needed by clicking the Add New Phone button.

Clicking on this button will generate a dialog box to add the client's phone number to the system.
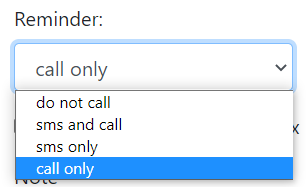
Reminder: Select this dropdown menu for your reminder options.

Adding an Address:
To add a new address to the client file, click the +Add New Address button.
Adding an Email:
To add an email address to the client file, click on +Add Email sign next to Emails.
This will generate a box to add the email information.
After you enter the email address, hit the +Add Email button. This will show up on the Demo (demographic) page.
Registering Information:
- Click the pencil icon next to Extended Information to document information such as race, ethnicity, primary language, etc.
Click the Magnifying Glass icon to view any information that has already been entered.
Extended Information includes the following fields:
- Ethnicity
- Race
- Tribal Affiliation
- Marital Status
- Primary Language
- Second Language
- Third Language
- Fourth Language
- Needs Translator
- Sexual Orientation
- Religion
- Living Arrangements
- Living Situation
- Number of Dependents
- Dx Category at Time of Registration
- First app offer
- JJ Involvement
- PS Involvement
- CYFD Child Target Population
- Child Target Population Reason
- Agency Involvement other than CYFD
- Income Support Division
- Medicaid
- Social Security
- Public Health
- HUD
- Mental Health Agency
- School Program
- Disability Support
Other AgencyThe following box will be displayed on clicking the pencil icon.
Hit button to save the information to the client file.

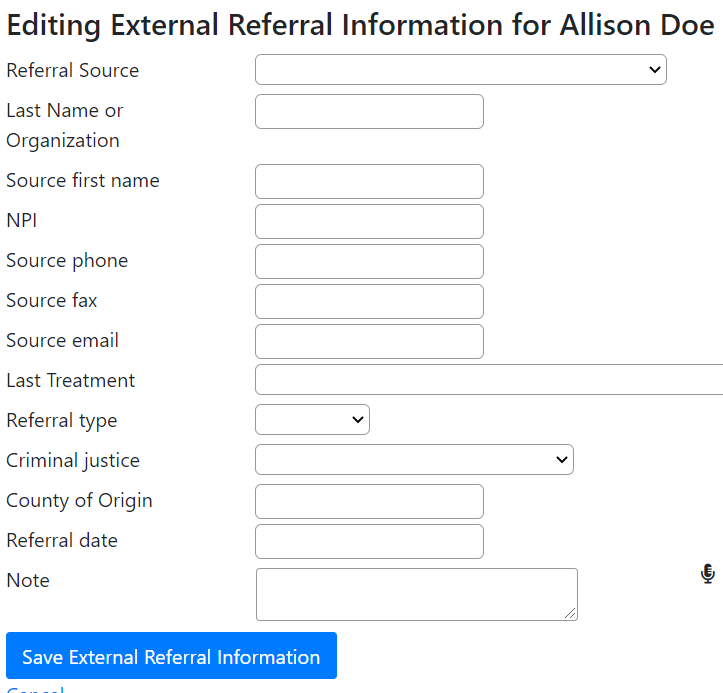
External referral information:
Referral information about the client should be added here by clicking on the  button which will generate the following form:
Clicking on Assign PCP would assign a primary care physician to the client.

Assign Pharmacy can be used to add clients pharmacy details.
Adding new relationships:
By default, the system will create the "self" relationship. This represents the client and cannot be deleted. To edit an existing relationship click the pencil icon. By doing so you can edit multiple details such as the income and quality of relationship of the client
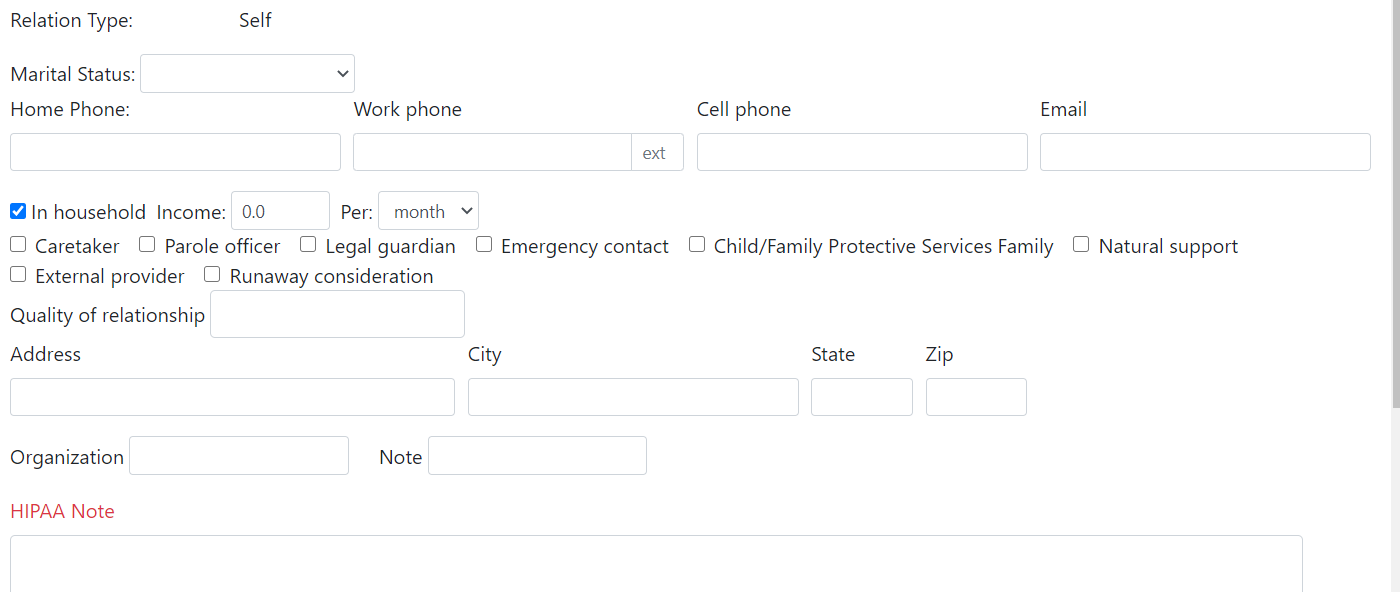
Click the Add New Relationship button to create a new relationship.

After completing all the fields, click on create relationship button to add it to the client file.
Adding Notes:
This will display the referral information of client.

Copay Report:
This will generate a csv file with the information of all the copays required for the day.
Verification Worksheet:
This is will generate a csv file with general information about the client like his phone number, if HIPAA OK.
Appointment:
Search the client whose appointment history is needed.

Clicking on the client name will generate the following page. click on Apps to get the appointment history of the patient.

If an encounter was completed during the appointment, a link will be shown in the status column.

EF stands for encounter file.