Scheduling an Appointment
Creating new appointments
- If you want to create an appointment in the weekly calendar click on Dashboard > Front Desk(subsection) > Appointment, weekly.

- To create a new appointment in the daily calendar select the all provider view.

- Select the provider you want to create an appointment for.

- Left side display the active providers and right dropdown menu will display the inactive providers

- After you choose the required provider, you can click on the date picker to pick a date.
- This will open a calendar that allows you to choose the month and date for the next appointment.
- Clicking on the yellow strip will open this box.
- Make sure the date and time that appear in the new appointment box is correct.

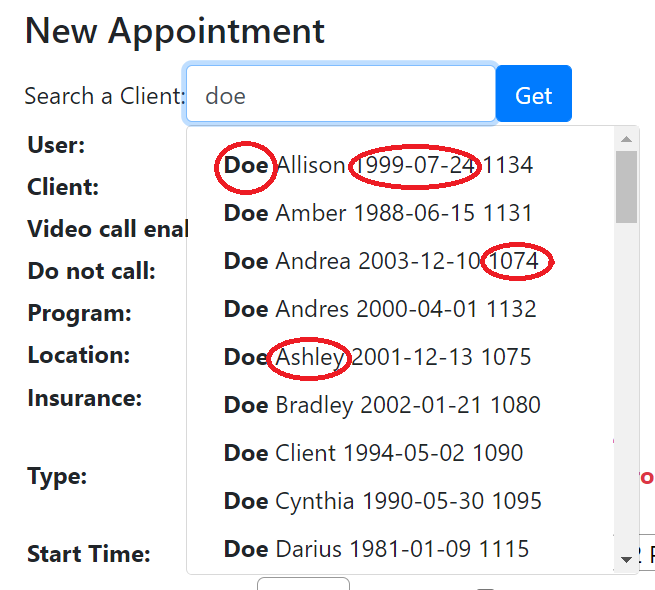
- Search for the client by typing the name in the box.
- If the client is new then add the client into the system and then try scheduling an appointment for the client.
- This will generate suggestion with all the names similar to the searched client.
- You can even search with clients DOB in mm/dd/yyyy format, ssn or client ID #.

Once an appointment has been scheduled and checked in, "no show" or "cancellation" will show up on the appointments as seen below:


